

In this tutorial, we will explain how to install Wordpress with Nginx MariaDB on Rocky Linux 9. The tutorial will guide you to install and configure Nginx as web server, PHP, MariaDB as a database.
WordPress most popular CMS. It is a free and open-source content management system written in PHP and paired with a MySQL or MariaDB database.
Install Wordpress With Nginx MariaDB on Rocky Linux 9
Prerequisite:
- A Rocky Linux 9 dedicated server or KVM VPS .
- A root user access or normal user with sudo privileges.
1. Keep the server up-to-date:
sudo dnf update -y
2. Install Nginx
sudo dnf install nginx -y
Start and enable Nginx service using following command:
sudo systemctl start nginx && sudo systemctl enable nginx
In case, you enabled UFW firewall and firewall block requests of the apache web server, open a port in the firewall.
sudo firewall-cmd --add-port=80/tcp --permanent
sudo firewall-cmd --add-port=443/tcp --permanent
sudo firewall-cmd --reload
Now, let’s verify the Nginx installation. Open browser and navigate to your server IP, it will show default test page.
3. Install MariaDB
First, we need to add MariaDB repo. Create a mariadb.repo file in /etc/yum.repo.d/ directory.
sudo vi /etc/yum.repos.d/mariadb.repo
We need to import the public key used by the package management system. We can import it using following command:
[mariadb]
name = MariaDB
baseurl = https://rpm.mariadb.org/10.11/rhel/$releasever/$basearch
gpgkey = https://rpm.mariadb.org/RPM-GPG-KEY-MariaDB
gpgcheck = 1
Now, run the installation command.
sudo dnf install mariadb-server -y
Start and enable the mariadb.service using following command:
sudo systemctl start mariadb && systemctl enable mariadb
Login into mysql and create a database and user.
sudo mysql
We can create the database for WordPress by typing:
MariaDB [(none)]> CREATE DATABASE wordpress DEFAULT CHARACTER SET utf8 COLLATE utf8_unicode_ci;
You can replace and call wordpress whatever you like.
Now, create a user and grant the permision of the database we have created eariler.
MariaDB [(none)]> GRANT ALL ON wordpress.* TO 'wordpressuser'@'localhost' IDENTIFIED BY 'password';
Resplace wordpressuser to your username and set password with strong password.
To refect the change run following command:
MariaDB [(none)]> FLUSH PRIVILEGES;
Once everything done, EXIT the mysql.
MariaDB [(none)]> exit;
4. Install and configure PHP
First, we need to install EPEL.
sudo dnf install epel-release -y
List available PHP module.
sudo dnf module list php
Next, enable PHP 8.1 using following command:
sudo dnf module install php:8.1
Finally, install PHP packages that required for the WordPress installation.
sudo dnf install php-fpm php-curl php-gd php-intl php-mbstring php-soap php-xml php-zip php-mysqli -y
Verify the PHP installation:
php -v
Open php.ini file and look for the parameter that sets cgi.fix_pathinfo.
sudo vi /etc/php.ini
We will be uncommented by removing semi-colon(;) and set to 0.
cgi.fix_pathinfo=0
Once you have done, save and exit.
Next, restart php-fpm service:
sudo systemctl restart php-fpm
5. Configure Nginx
Configure Nginx server block to use specific domain name and PHP Processor. Here we are creating new server block.
sudo vi /etc/nginx/conf.d/hostnextra.com.conf
Note: Replace hostnextra.com with your domain name.
Add following lines:
server {
    server_name server_domain_name_or_IP;
    root /var/www/wordpress;
    index index.html index.htm index.nginx-debian.html index.php;

    location / {
        try_files $uri $uri/ /index.php$is_args$args;
    }

    location = /favicon.ico { log_not_found off; access_log off; }
    location = /robots.txt { log_not_found off; access_log off; allow all; }
    location ~* \.(css|gif|ico|jpeg|jpg|js|png)$ {
        expires max;
        log_not_found off;
    }
    location ~ \.php$ {
        try_files $uri =404;
        fastcgi_split_path_info ^(.+\.php)(/.+)$;
        fastcgi_pass unix:/run/php-fpm/www.sock;
        fastcgi_index index.php;
        fastcgi_param SCRIPT_FILENAME $document_root$fastcgi_script_name;
        include fastcgi_params;
    }
}
Replace the server_domain_name_or_IP to your server IP or website name.
Test the configuration file.
sudo nginx -t
If there are no errors, restart the Nginx to make the necessary changes.
sudo systemctl restart nginx
6. Download and Extract WordPress
Now, we can download latest version of the WordPress. Use /tmp directory to download and extract WordPress.
cd /tmp
sudo curl -LO https://wordpress.org/latest.tar.gz
Extract the compressed file to create the WordPress directory structure:
sudo tar xzvf latest.tar.gz -C /var/www/
Next, change the wp-config-sample.php config file name to wp-config.php.
cd /var/www/wordpress/

sudo cp wp-config-sample.php wp-config.php
Now, change the ownership to www-data user and group.
sudo chown -R nginx:nginx /var/www/wordpress/
7. WordPress configuration file
Next, we need to set up main WordPress configuration file. We need to generate WordPress secret key. WordPress provides a secure generator for these values so that you do not have to try to come up with good values on your own.
To grab secure values from the WordPress secret key generator, type:
sudo curl -s https://api.wordpress.org/secret-key/1.1/salt/
The above command will generate secret key. Copy the secret key and past it in to the WordPress configuration file wp-config.php.
sudo nano wp-config.php
Find the section that contains the dummy values for those settings.
It will looks like:
...

define('AUTH_KEY', 'put your unique phrase here');
define('SECURE_AUTH_KEY', 'put your unique phrase here');
define('LOGGED_IN_KEY', 'put your unique phrase here');
define('NONCE_KEY', 'put your unique phrase here');
define('AUTH_SALT', 'put your unique phrase here');
define('SECURE_AUTH_SALT', 'put your unique phrase here');
define('LOGGED_IN_SALT', 'put your unique phrase here');
define('NONCE_SALT', 'put your unique phrase here');

...
Delete those lines and paste in the values you copied from the command line.
Now, we need to add database name, user and password in the file also we can explicitly set the filesystem method to "direct". Like shown below:
...

define('DB_NAME', 'wordpress');

/** MySQL database username */
define('DB_USER', 'wordpressuser');

/** MySQL database password */
define('DB_PASSWORD', 'password');

...

define('FS_METHOD', 'direct');
Note: Replace above values with the values you have set.
Save and close the file once you are finished.
8. Install Certbot
Let's secure the website using SSL. We will issue a SSL certificate using Certbot which is free to use. Use following command to install Certbot:
sudo dnf install certbot python3-certbot-nginx -y
Obtain a SSL certificate using certbot command. The Nginx plugin will take care of reconfiguring Nginx and reloading the config.
sudo certbot --nginx -d hostnextra.com
Note: Replace hostnextra.com to your domain name.
By running certbot first time, you will be prompted to enter an email address and agree to the terms of service.
At this point, we have successfully installed everything needed. Now let's navigate to the browser and access the domain.
9. Complete the WordPress Installation
We have finished server side configurations.
In your web browser, navigate to your server’s domain name or public IP address:
http://server_domain_or_IP
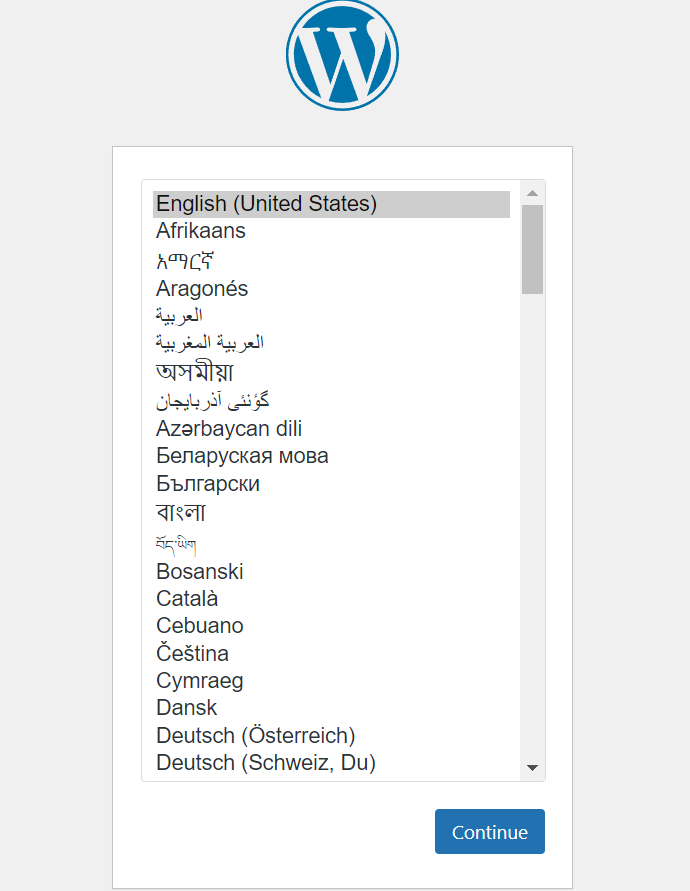
Select the language you would like to use and click continue, next it will ask to enter some information like site title, email id and set the admin username and password. Once every is set, click Install WordPress button. Once, the installation gets completed, click on the Log In button, it will redirect to login page. Enter admin username and password, the one you have set previously.
We have successfully installed WordPress.
In this tutorial we have explained how to install WordPress with Nginx MariaDB on Rocky Linux 9 server.